Deploy using YAML file
This document will guide you on how to use Rainbond's YAML import feature to deploy a fully functional WordPress blog system by uploading standard Kubernetes YAML files.Through this guide, you will learn how Rainbond seamlessly converts native Kubernetes resources into platform application models.
Preparation
- Understand the Conversion principle from Kubernetes resources to Rainbond application models
- Prepare the example
example.yamlfile, which contains the following Kubernetes resources:
Deployment: WordPress application componentStatefulSet: MySQL database componentService: MySQL service resource
example.yaml
---
apiVersion: v1
kind: Service
metadata:
  name: mysql-wordpress-example
  labels:
    app: mysql-wordpress-example
spec:
  type: ClusterIP
  ports:
    - port: 3306
      targetPort: mysql
  selector:
    app: mysql-wordpress-example
---
apiVersion: apps/v1
kind: Deployment
metadata:
  name: wordpress-example
  labels:
    app: wordpress-example
spec:
  selector:
    matchLabels:
      app: wordpress-example
  template:
    metadata:
      labels:
        app: wordpress-example
    spec:
      containers:
        - name: wordpress-example
          image: registry.cn-hangzhou.aliyuncs.com/goodrain/bitnami-wordpress:6
          imagePullPolicy: IfNotPresent
          env:
          - name: WORDPRESS_DATABASE_HOST
            value: "mysql-wordpress-example"
          - name: WORDPRESS_DATABASE_PORT_NUMBER
            value: "3306"
          - name: WORDPRESS_DATABASE_PASSWORD
            value: "wordpress"
          - name: WORDPRESS_DATABASE_USER
            value: "root"
          - name: WORDPRESS_DATABASE_NAME
            value: "wordpress"
          - name: WORDPRESS_USERNAME
            value: "admin"
          - name: WORDPRESS_PASSWORD
            value: "admin"
          ports:
            - name: http
              containerPort: 8080
          volumeMounts:
            - name: wordpress-persistent-storage
              mountPath: /var/www/html
      volumes:
        - name: wordpress-persistent-storage
          emptyDir: {}
---
apiVersion: apps/v1
kind: StatefulSet
metadata:
  name: mysql-wordpress-example
  labels:
    name: mysql-wordpress-example
spec:
  selector:
    matchLabels:
      app: mysql-wordpress-example
  template:
    metadata:
      labels:
        app: mysql-wordpress-example
    spec:
      containers:
      - image: registry.cn-hangzhou.aliyuncs.com/goodrain/bitnami-mysql:latest
        name: mysql
        env:
        - name: MYSQL_ROOT_PASSWORD
          value: "wordpress"
        - name: MYSQL_DATABASE
          value: "wordpress"
        ports:
        - containerPort: 3306
          name: mysql
        volumeMounts:
        - name: mysql-data
          mountPath: /var/lib/mysql
      volumes:
      - name: mysql-data
        emptyDir: {}
Implementation steps
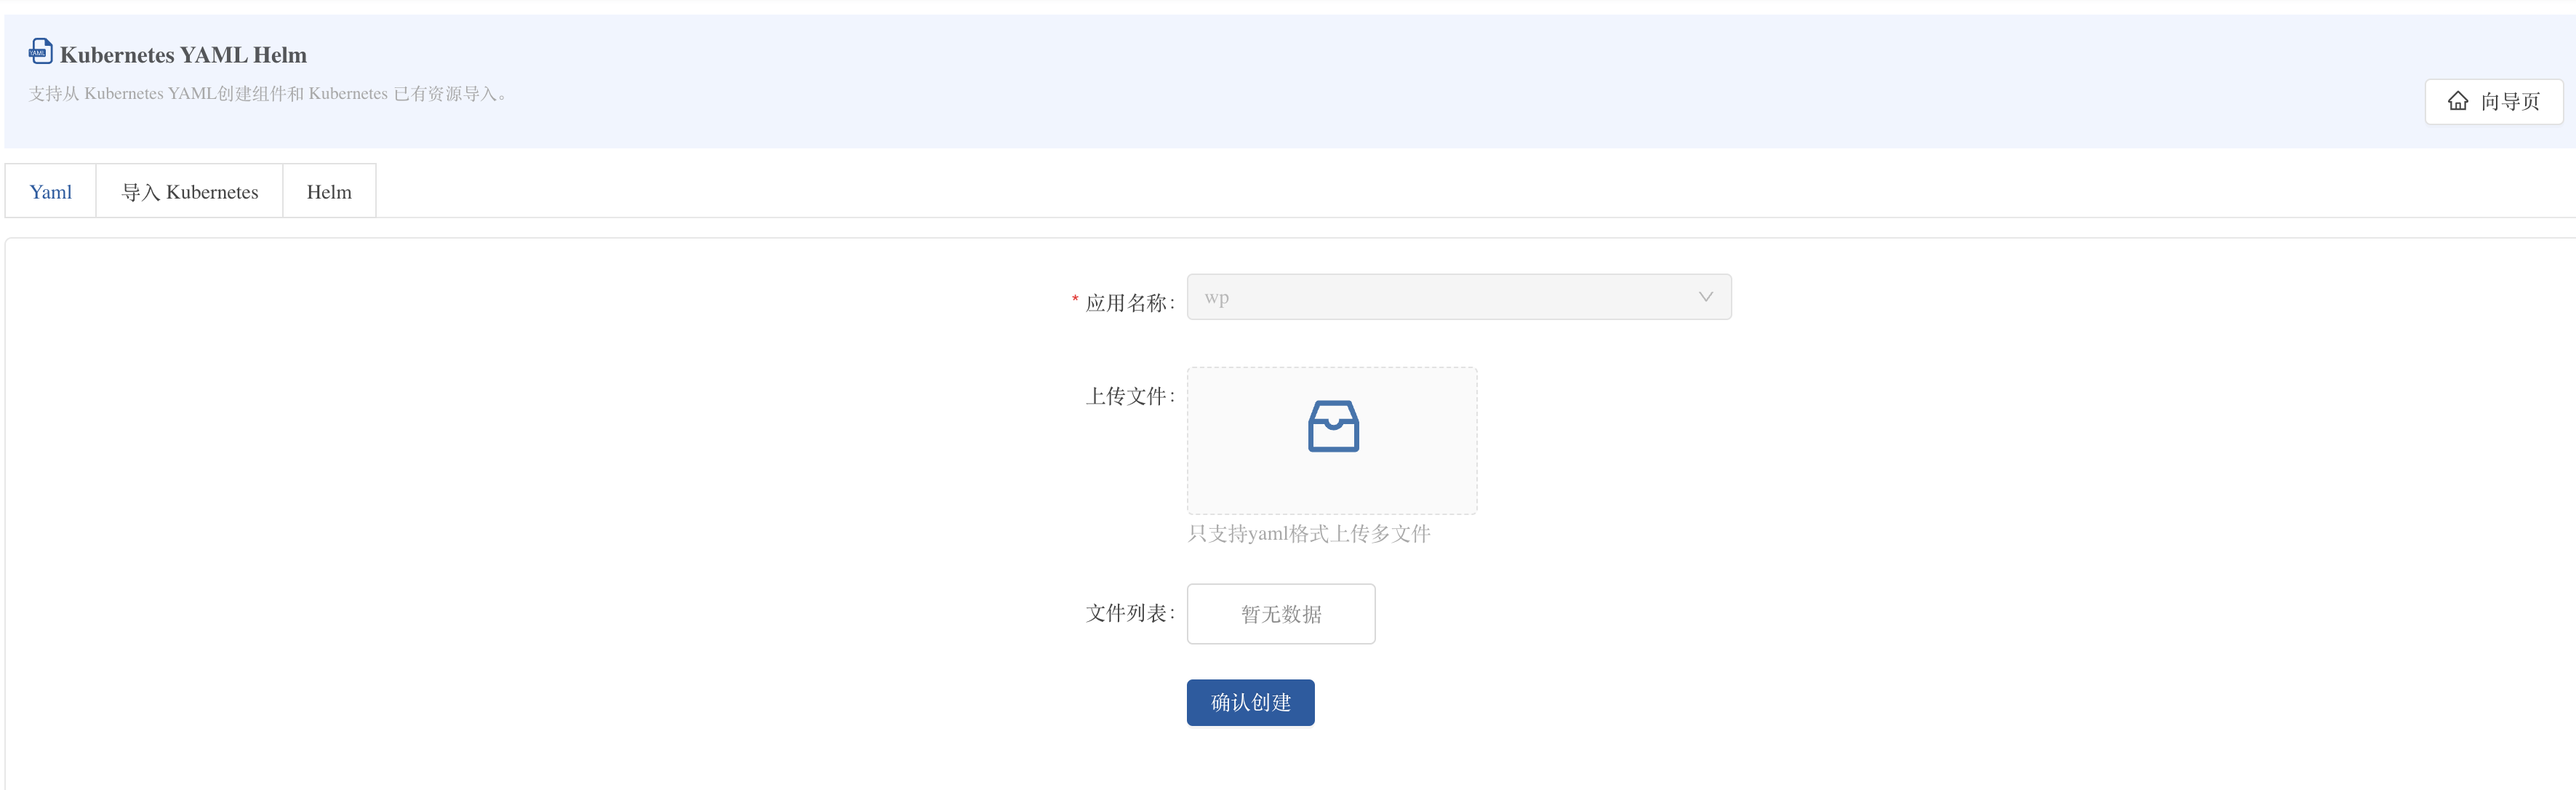
1. Import YAML file
- Enter the Rainbond platform and select the target team
- Click New Application → Kubernetes YAML/Helm → YAML file upload
- Select the local
example.yamlfile to the upload area - Click Confirm upload
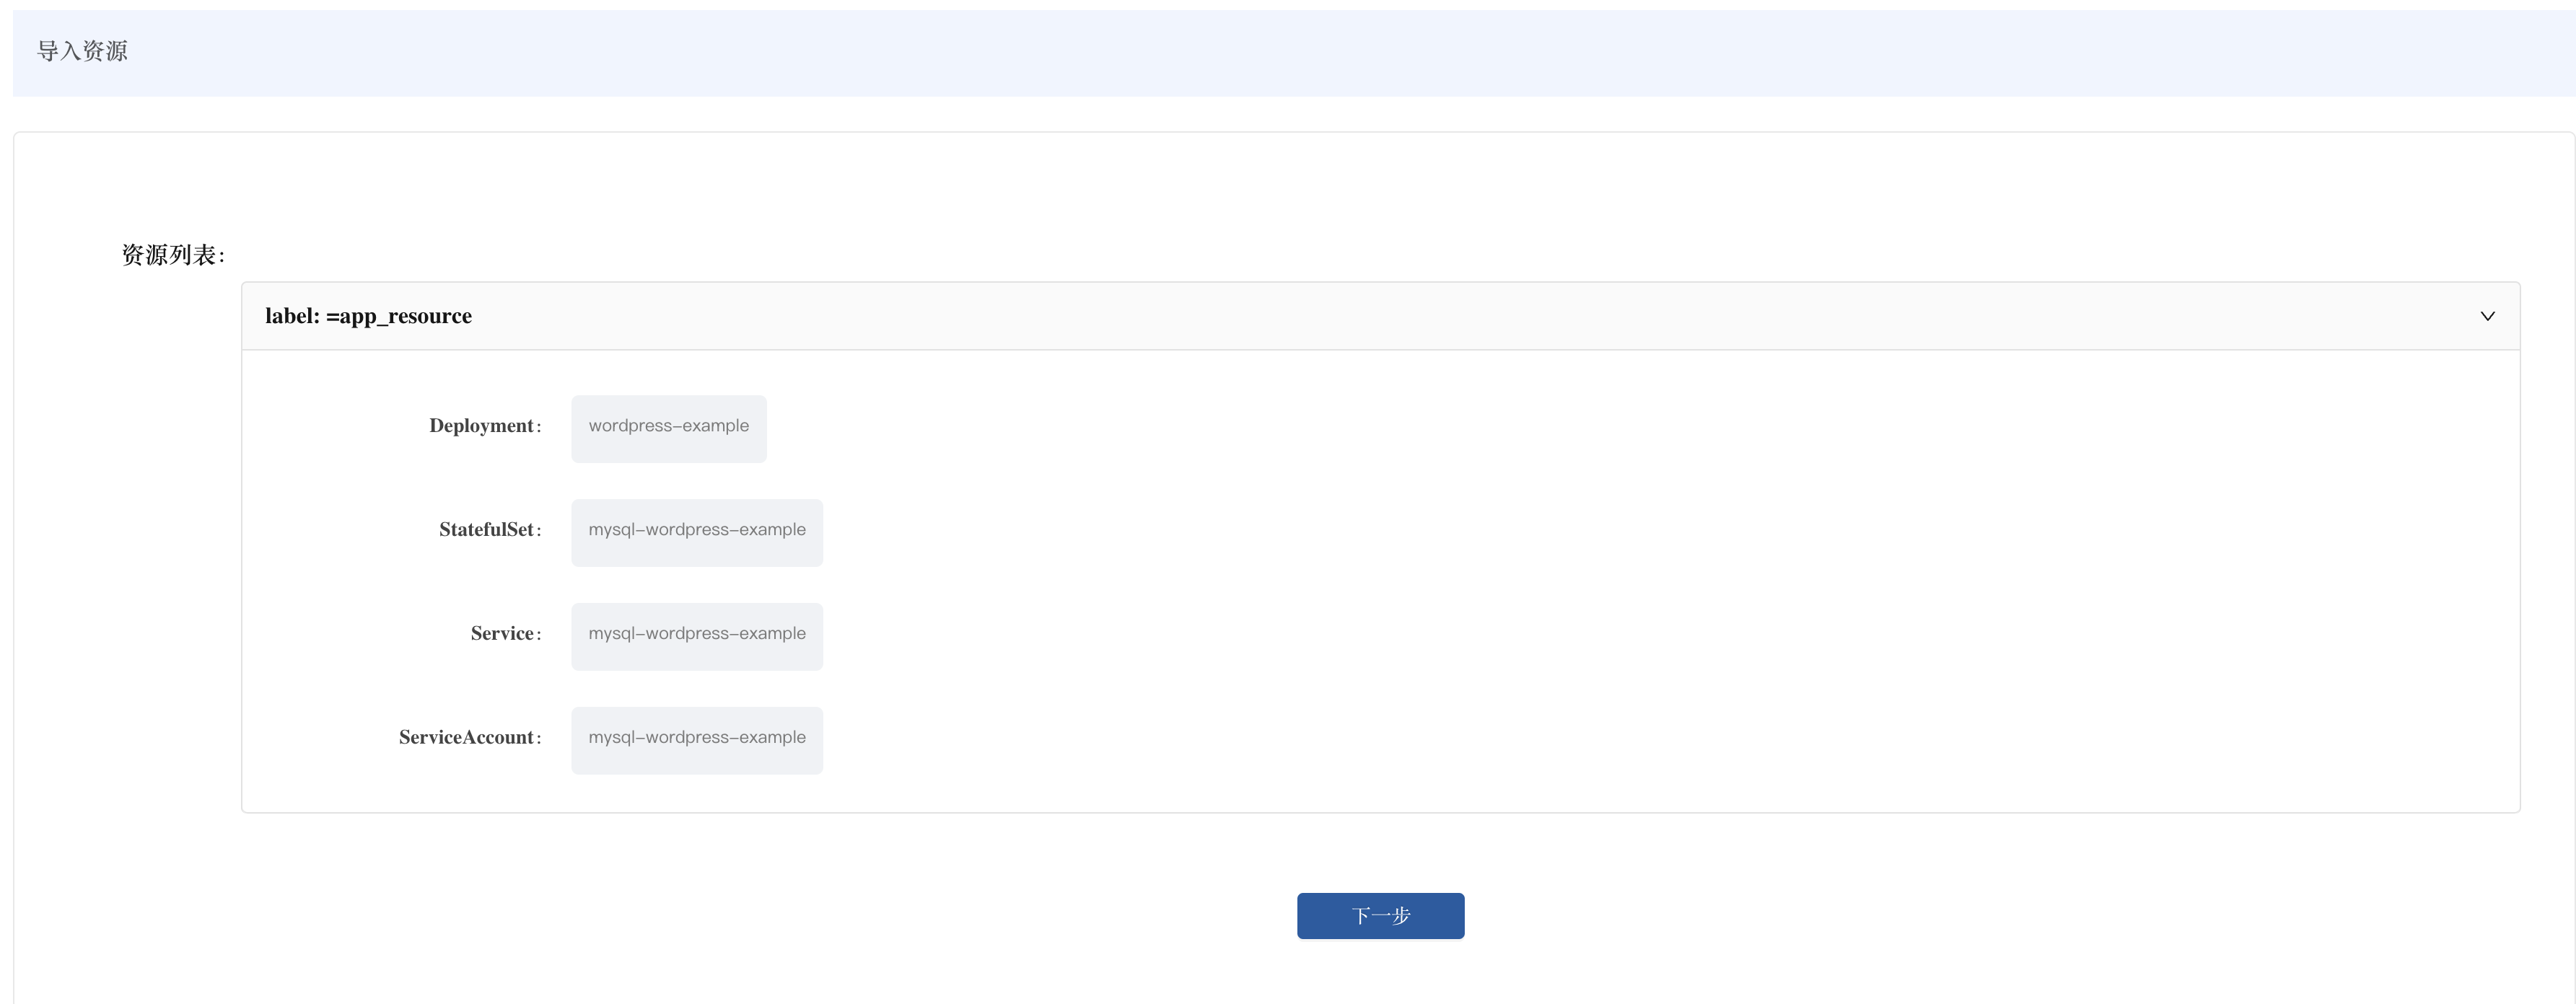
2) Resource identification phase
After uploading, Rainbond automatically identifies the Kubernetes resources contained in the YAML file and displays them as a list:
- Workload resources:
Deployment: wordpress-example (WordPress application server)StatefulSet: mysql-wordpress-example (MySQL database server)
- Service resources:
Service: mysql-wordpress-example (MySQL service)
After confirming the resource list is correct, click Next.
3. Application model conversion
Rainbond converts the identified Kubernetes resources into platform application models:
-
WordPress component: Converted from
Deploymenttype workload- Container image, environment variables, mounted volumes and other specifications are mapped to the corresponding Rainbond configuration items
- Port configuration is converted to component port settings
-
MySQL component: Converted from
StatefulSettype workload- Database parameters are retained through environment variables
- Storage volume configuration is converted to storage settings
-
Other Kubernetes resources: Enter the application's K8s resources management panel
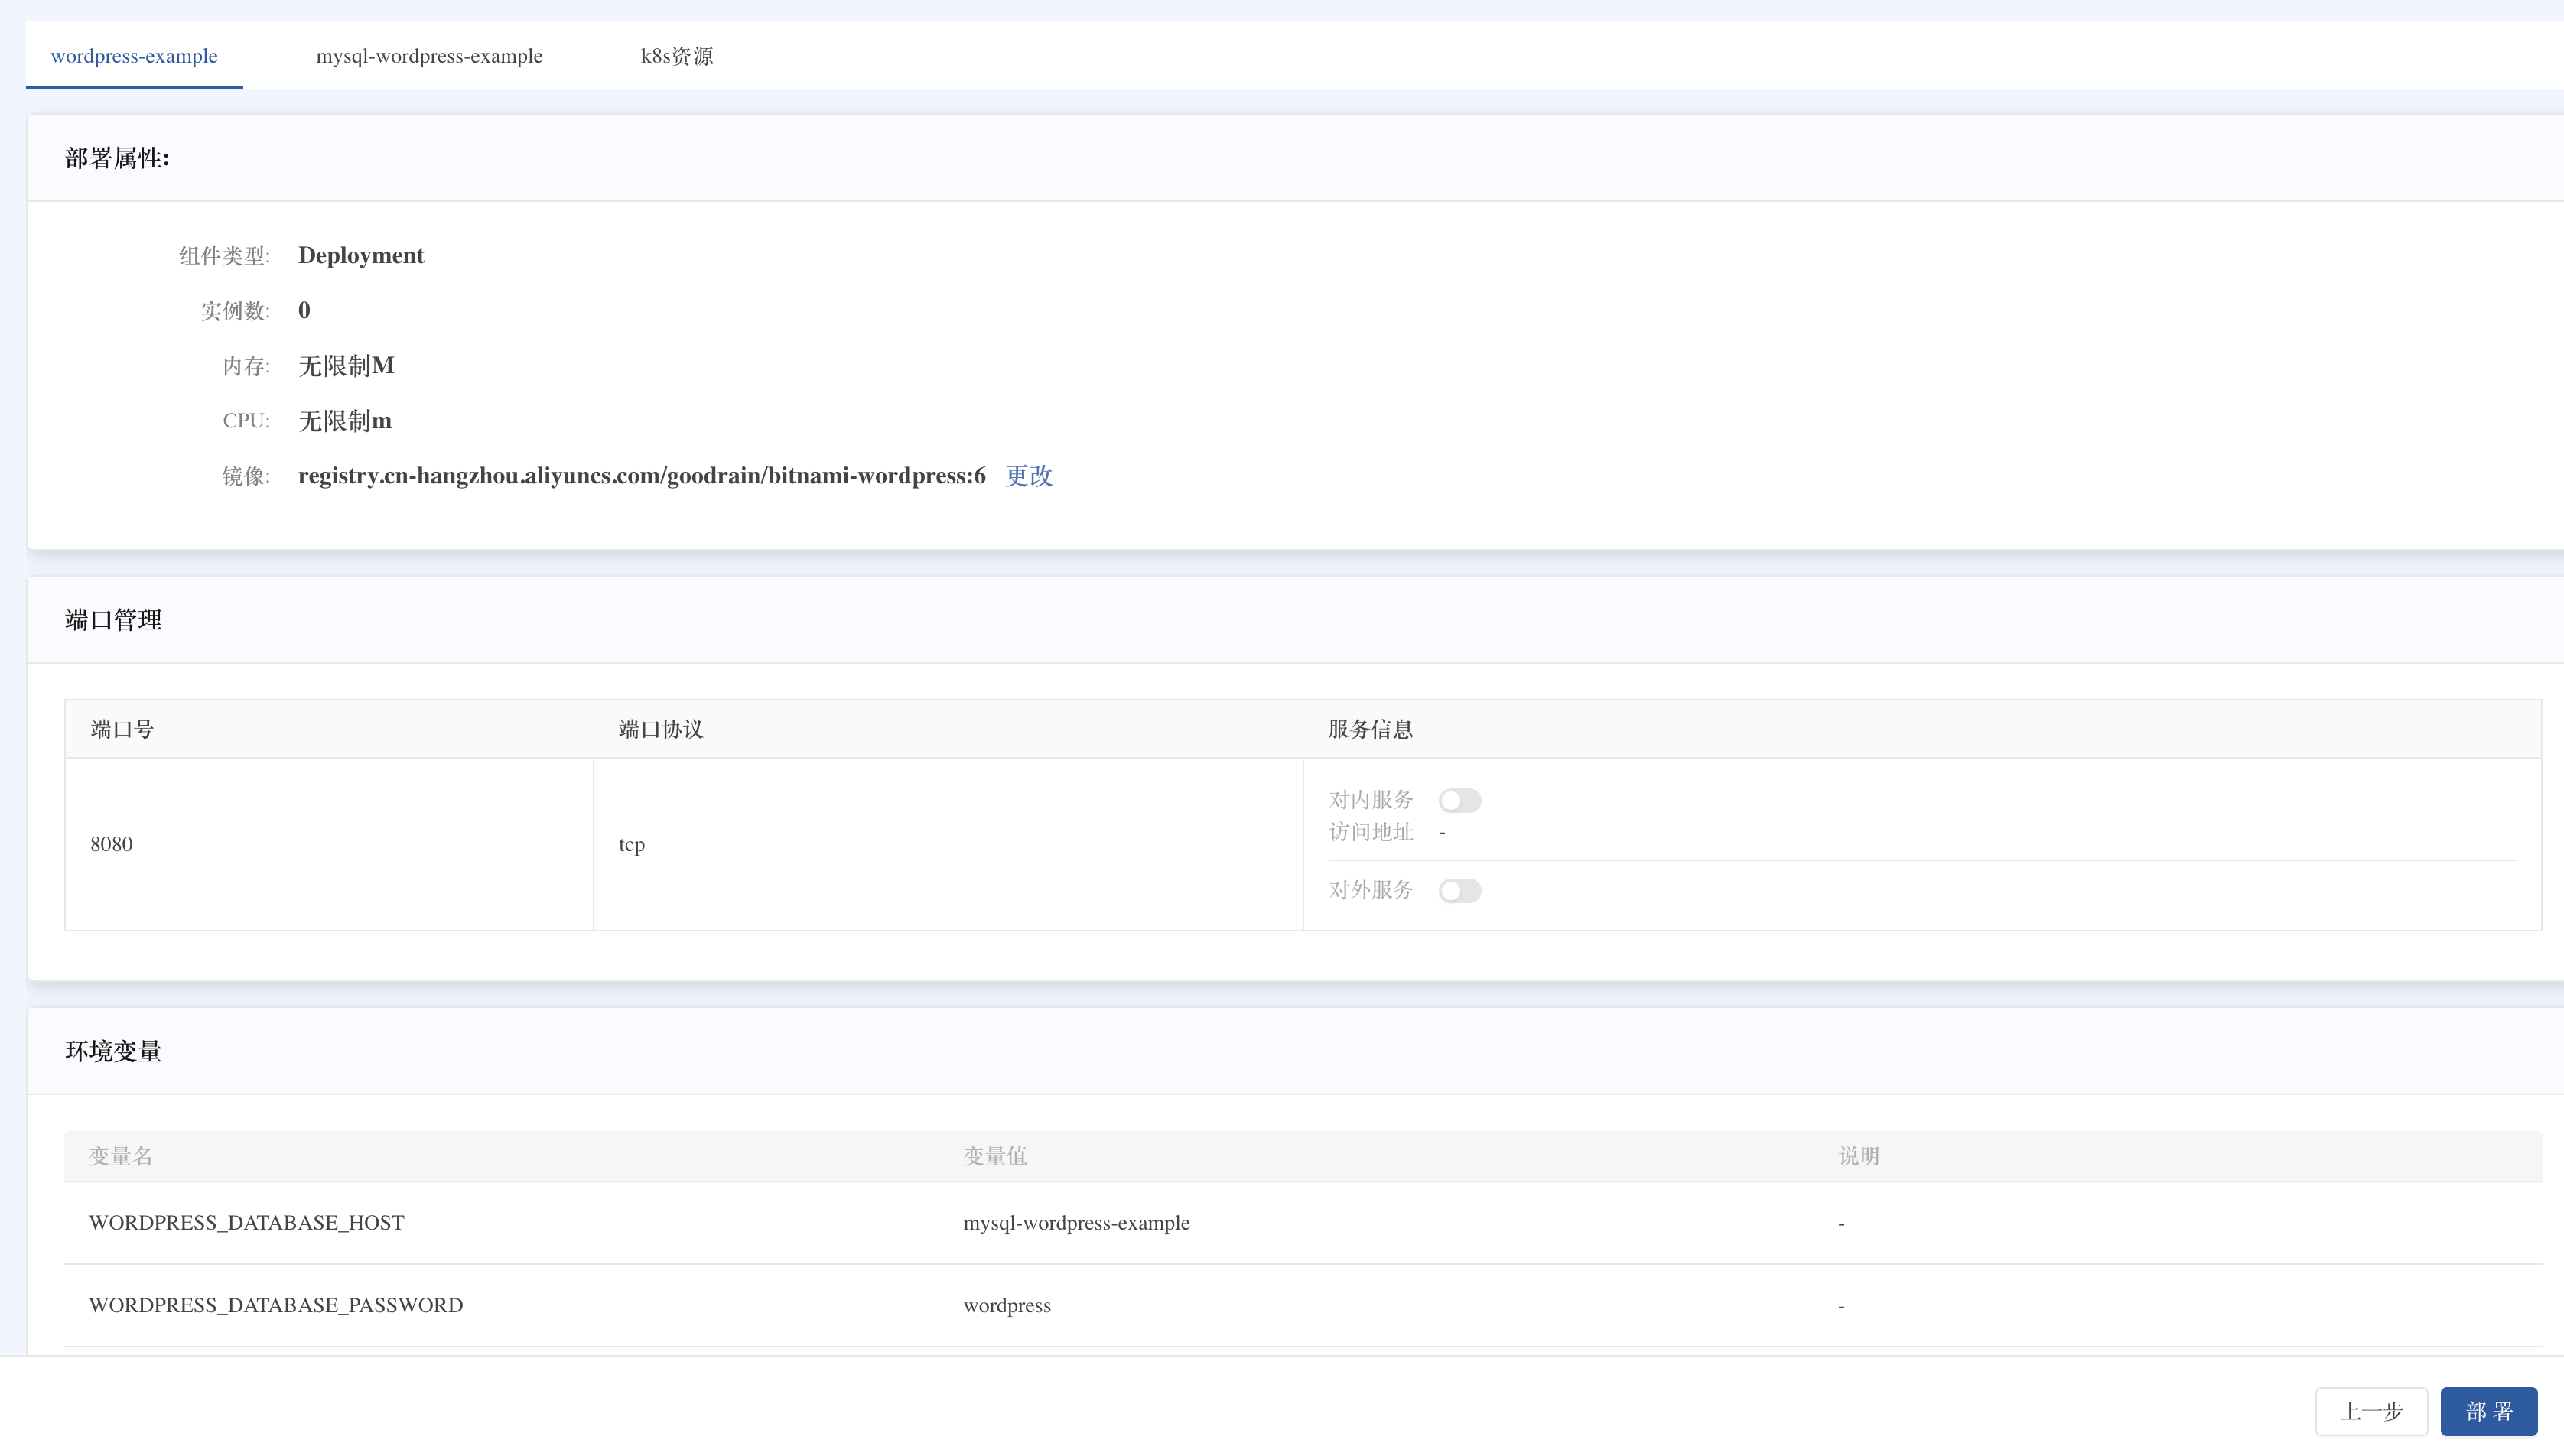
After checking the conversion results are correct, click Deploy.
4. Deploy and access the application
- On the application topology page, click the Start button to start the entire application
- Wait for all components to start (status turns green running)
- Enter the
wordpress-examplecomponent details page → Port tab - Enable External service for WordPress's HTTP port (8080)
- Use the generated access address to open the WordPress site
Tip: WordPress admin backend path is
/wp-admin, default admin account/password:admin/admin
Optimization configuration
Storage persistence optimization
The storage resources defined in the YAML file (such as EmptyDir) can be optimized in Rainbond:
- After import, the original YAML's
volumeMountsandvolumesconfigurations will be saved in the component's Other settings > Kubernetes properties - For data that needs to be persisted (such as WordPress content and MySQL data), it is recommended to use Rainbond's storage function:
- Delete the corresponding
volumeMounts/volumesentries in Kubernetes properties - Enter the component's Storage > Storage settings > Add storage
- Add the corresponding persistence path
- For example MySQL's
/bitnami/mysql/data - For example WordPress's
/bitnami/wordpress
- For example MySQL's
Troubleshooting
- Component startup failure: Check the component's events and logs to confirm whether the image pull and resource configuration are correct
- WordPress cannot connect to MySQL: Check the environment variable configuration to ensure the database connection parameters are correct and the MySQL service has started normally
- Data persistence issue: If the default EmptyDir is used, data will be lost after restart. Please refer to the above storage optimization configuration for persistent storage